Friday, October 31, 2014

Little things that make live easier #2: sys.ora_mining_number_nt

With Oracle, sys.ora_mining_number can be used to turn a set of numbers to a result set:
SQL> select * from table(sys.ora_mining_number_nt(4, 20, 15)); COLUMN_VALUE ------------ 4 20 15

Thursday, October 30, 2014

Is this a bug in the PL/SQL compiler

I had some leisure time and sifted through some of my old stackoverflow questions and answers. On December 22nd, 2010, I asked the question Is this a bug in the PL/SQL compiler. It turned out, that the following PL/SQL compiles (at least on Oracle 11):
create or replace package return as subtype return is varchar2(10); end return; / create or replace package tq84 as constant constant return . return := 'return'; function function return return . return; end tq84; /

I still find this quite funny, so I had to post it on this blog!

Thursday, October 23, 2014

Creating psychedelic images with word and VBA

The Shape object of MS-Word can be used to insert pictures into word documents with VBA. If I insert a small picture and blow it up to use the entire page size, it creates a cool, almost psychedelic effect.

Here's the image: Its size is 20x30 pixels, approximately the aspect ratio of an A4 document.

The function, named main needs a parameter, path, that points to the location of the image:

sub main(path)

First, we declare a variable for the image (background_image), which is a shape), then load an image and assign it to the variable:

dim background_image as shape set background_image = activeDocument.shapes.addPicture( _ fileName := path & "\background.png", _ linkToFile := false)

Then, we need to place the image's top left corner on the page's top left corner:

background_image.relativeVerticalPosition = _ wdRelativeVerticalPositionPage background_image.top = 0 background_image.relativeHorizontalPosition = _ wdRelativeHorizontalPositionPage background_image.left = 0

Finally, we want the image to be behind the text in case we're going to write on it:

background_image.zOrder msoSendBehindText

This VBA program should be saved into a file, for example backgroundImage.bas. It can then be executed with a

runVBAFilesInOffice.vbs -word backgroundImage -c main %CD%
.

The resulting word (or image) then looks like

See this link for runVBAFilesInOffice.vbs.

Source code on github

Friday, October 17, 2014

Cloning a user in Oracle

dbms_metadata makes it simple to clone a user. Here's a demonstration.

First, I create a small schema with some simple grants: The first user (a_user) is needed to contain a few tables to test if grants to these tables will be cloned:

create user a_user identified by a_password;

The second user (user_to_be_cloned) is the user that I will actually duplicate:

create user user_to_be_cloned identified by "Secret*49" quota 10M on users;

I also need a role through which I will grant an object privilege:

create role a_role;

Creating the mentioned tables:

create table a_user.table_01 (id number); create table a_user.table_02 (id number); create table a_user.table_03 (id number);

Granting some privileges:

grant create session, create table to user_to_be_cloned; grant select, insert on a_user.table_01 to user_to_be_cloned; grant all on a_user.table_02 to a_role; grant a_role to user_to_be_cloned;

Now, I want an sql script that contains the necessary statements to clone the user. The following script uses the SQL*Plus spool command to create the file (so it is designed to be run in SQL*Plus).
It also uses replace a lot to change USER_TO_BE_CLONED to CLONED_USER.

set heading off set pages 0 set long 1000000 set termout off exec dbms_metadata.set_transform_param( dbms_metadata.session_transform, 'SQLTERMINATOR', true); spool create_cloned_user.sql select replace( dbms_metadata.get_ddl( 'USER', 'USER_TO_BE_CLONED' ), '"USER_TO_BE_CLONED"', 'CLONED_USER' ) from dual; select replace( dbms_metadata.get_granted_ddl( 'SYSTEM_GRANT', 'USER_TO_BE_CLONED' ), '"USER_TO_BE_CLONED"', 'CLONED_USER' ) from dual; select replace( dbms_metadata.get_granted_ddl( 'OBJECT_GRANT', 'USER_TO_BE_CLONED' ), '"USER_TO_BE_CLONED"', 'CLONED_USER' ) from dual; select replace( dbms_metadata.get_granted_ddl( 'ROLE_GRANT', 'USER_TO_BE_CLONED' ), '"USER_TO_BE_CLONED"', 'CLONED_USER' ) from dual; select replace( dbms_metadata.get_granted_ddl( 'TABLESPACE_QUOTA', 'USER_TO_BE_CLONED' ), '"USER_TO_BE_CLONED"', 'CLONED_USER' ) from dual; spool off set termout on

The created script can now be used to create the cloned user. After logging on with CLONED_USER you can verify that the grants are cloned, too, by trying to select from a_user.table_01, a_user.table_02 and a_user.table_03.

Source code on github

Thursday, October 9, 2014

How UBS cuts costs for finding solutions to their Big Data problems

This is interesting: the UBS Innovation Challenge.

Here's what it boils down to: UBS has lots of data and everybody talks about turning Big Data into Big Money. This is exactly what UBS want to to. The problem: UBS lacks the expertise and know how to tackle this kind of problem. After all, they're a bank. So, what can they do?

They could go to one of the many new Big Data consultancies that spring up like mushrooms these days and ask them for a solution. Yet, that is risky. How can a bank determine if such a consultancy is worth the money, especially in a field where those companies are relatively young. UBS could contact many consultancies. Of course, that will drive prices even higher. There must be a better way.

Indeed, UBS has found a better way. They do the UBS Innovation Challenge. Everybody can participate with ideas tailored to the UBS problem domain. UBS screens those ideas, selects a "best idea" and gives the winner SGD 40'000. There are additional costs, such as flights to Singapore and accomodations for the final participiants, but the costs for UBS are manageable.

So, UBS benefits in two ways: 1) They are presented with not only one or two ideas but with many ideas. 2) The costs for these ideas is known in advance.

Saturday, October 4, 2014

An open street map node density map for Switzerland

I'd like to know how open street map nodes are distributed in Switzerland, that is, I want to map their density on an image. This should be a fairly easy task with Python since I have already loaded Switzerland into an sqlite database (See OpenStreetMap: convert an pbf to an sqlite database with Python and download-switzerland-pbf.py [github]).

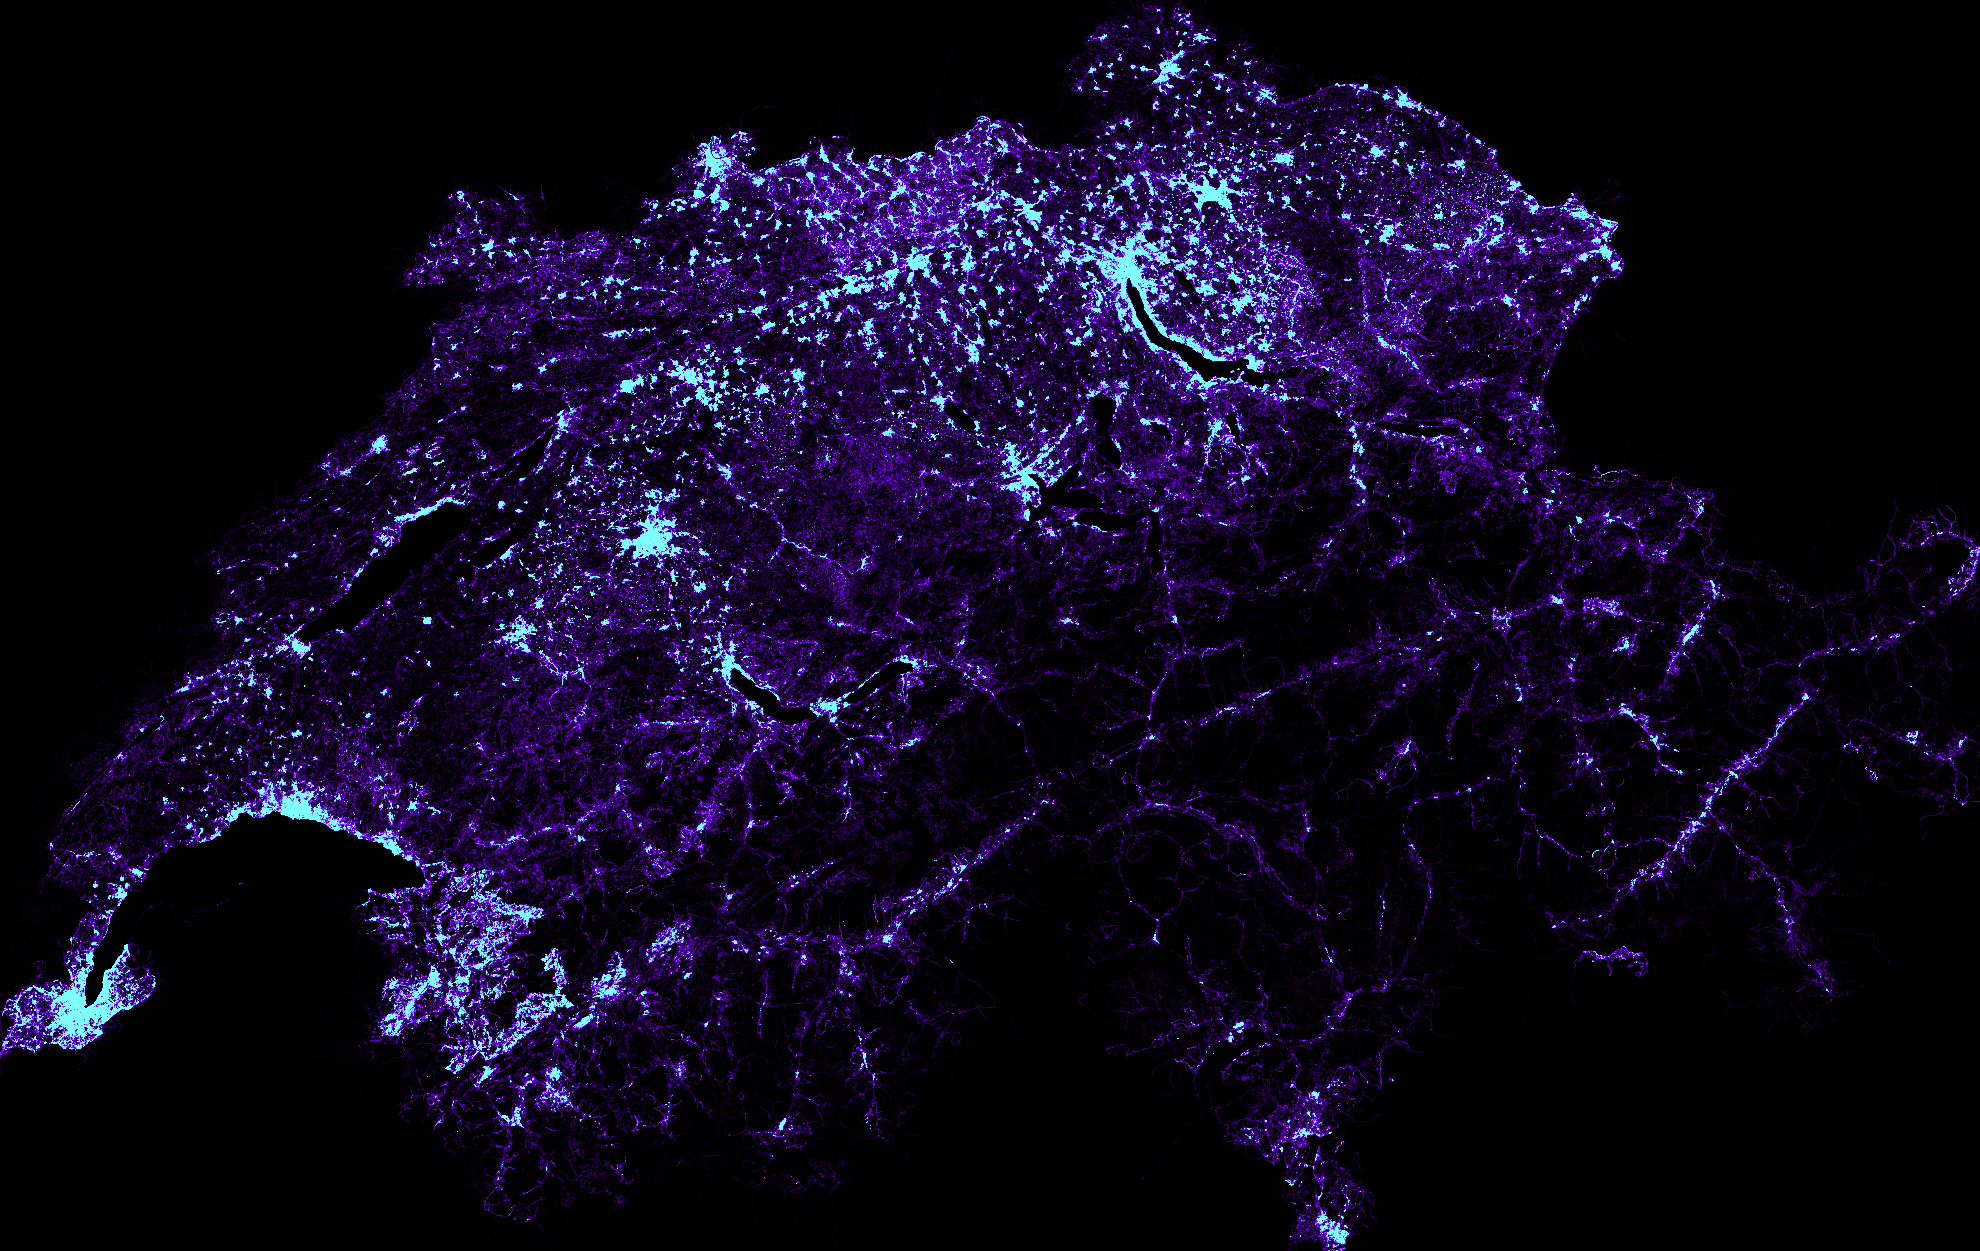
First, I create a table that contains the count of nodes per pixel. I fill this this table with a create table... as ...count(*).... group by. The values for the variables a through f determine the aspect ration and the size of the resulting picture:

create table count_per_pixel_ch as select count(*) cnt, cast ( ( lon - a ) / c * e as int) x, cast ( ( lat - b ) / d * f as int) y from node group by x, y;

x and y are unique. This pair represents a pixel on the final image. cnt is the number of nodes that fall into the area covered by a x/y pair.

After filling this table, I can iterate over each pixel and draw a color that is lighter for large pixel counts and darker for small pixel counts. I use the Python Image Library (import Image) to draw the image.

import Image # # Code filling the table # for r in cur.execute(""" select x, y, cnt from count_per_pixel_ch where x >= 0 and x < {image_width_px} and y >= 0 and y < {image_height_px} """.format( image_width_px = image_width_px , image_height_px = image_height_px)): x = r[0] y = image_height_px - r[1] - 1 cnt = float(r[2]) blue = int(float(cnt)/float(avg_count_per_pixel) * 255.0) green = 0 if blue > 255: green = blue - 255 blue = 255 pixels[x, y] = (blue/2, green, blue)

Here's the result:

The same picture with a better resolution.

Source code on github

Wednesday, October 1, 2014

A Google Earth hiking map for the Säntis region with Open Street Map data

After I have loaded a Switzerland pbf file (see download-switzerland-pbf.py or download-switzerland-pbf.bat) into an sqlite database (see OpenStreetMap: convert an pbf to an sqlite database with Python ), I can use this data to create a Google Earth kml file that highlights objects found in Open Street Map.

I am particularly intersted in creating an SAC hiking map for the Säntis region. For that end, I chose osm ways that have a tag named sac_scale.
Additionally, I restricted the respective nodes to the lattitude longitude for the Säntis region.

These ways are kept in a specific table:

create table sac_ways_around_saentis as select distinct wy.id way_id from tag tg join way wy on wy.id = tg.way_id join node_in_way nw on wy.id = nw.way_id join node nd on nd.id = nw.node_id where nd.lat > 47.2210118322 and nd.lat < 47.2604651483 and nd.lon > 9.3149215728 and nd.lon < 9.3959004678 and tg.k = 'sac_scale'

With this table, I can now extract the lattitude/longitude pairs for each node in the relevant ways and write them into a kml file.

The algorithm basically boils down to:

select way_id from sac_ways_around_saentis -- with each way_id: select node_id from node_in_way where way_id = ? order by order_ -- with node_id select lat, lon from node where id = ? -- Emit lat, lon into kml file
Of course, I would use a Python script for this (sac_ways_saentis.py on github).

Here's a screen shot of the result: